For Existing Users - Migrating to the new Quicken experience
Important: Once you open Quicken, it is crucial to backup your data file before proceeding with any further conversion steps.
Follow the steps below to ensure a seamless and secure migration process:
On Windows:
- Go to File > Copy or Backup File > Create a complete backup.
- Download the latest Quicken Update. Go to Help > Check for Updates.
- Complete a final transaction download. Accept all new transactions into the appropriate registers.
- Deactivate online banking connection for accounts connected to Goldman Sachs. Choose Tools > Account List.
- Click Edit on the account to deactivate.
- In Account Details, click Online Services.
- Click Deactivate. Follow prompts to confirm deactivation.
- Click the General tab.
- Remove the Financial Institution and Account Number information fields that are located on the General tab. Click OK to close the window.
- Repeat steps for any additional accounts that apply.
- Now reconnect the online banking connection for your accounts. Do not enter your Goldman.com username and password to connect to Quicken.
- Choose Tools > Account List.
- Click Edit on the account you want to activate.
- In Account Details, click Online Services and then choose Set up Now.
- Type your institution’s name in the search field (Goldman Sachs Private Wealth) and click Next.
- On the Add account page, select on the right-hand side Set Up Here link.
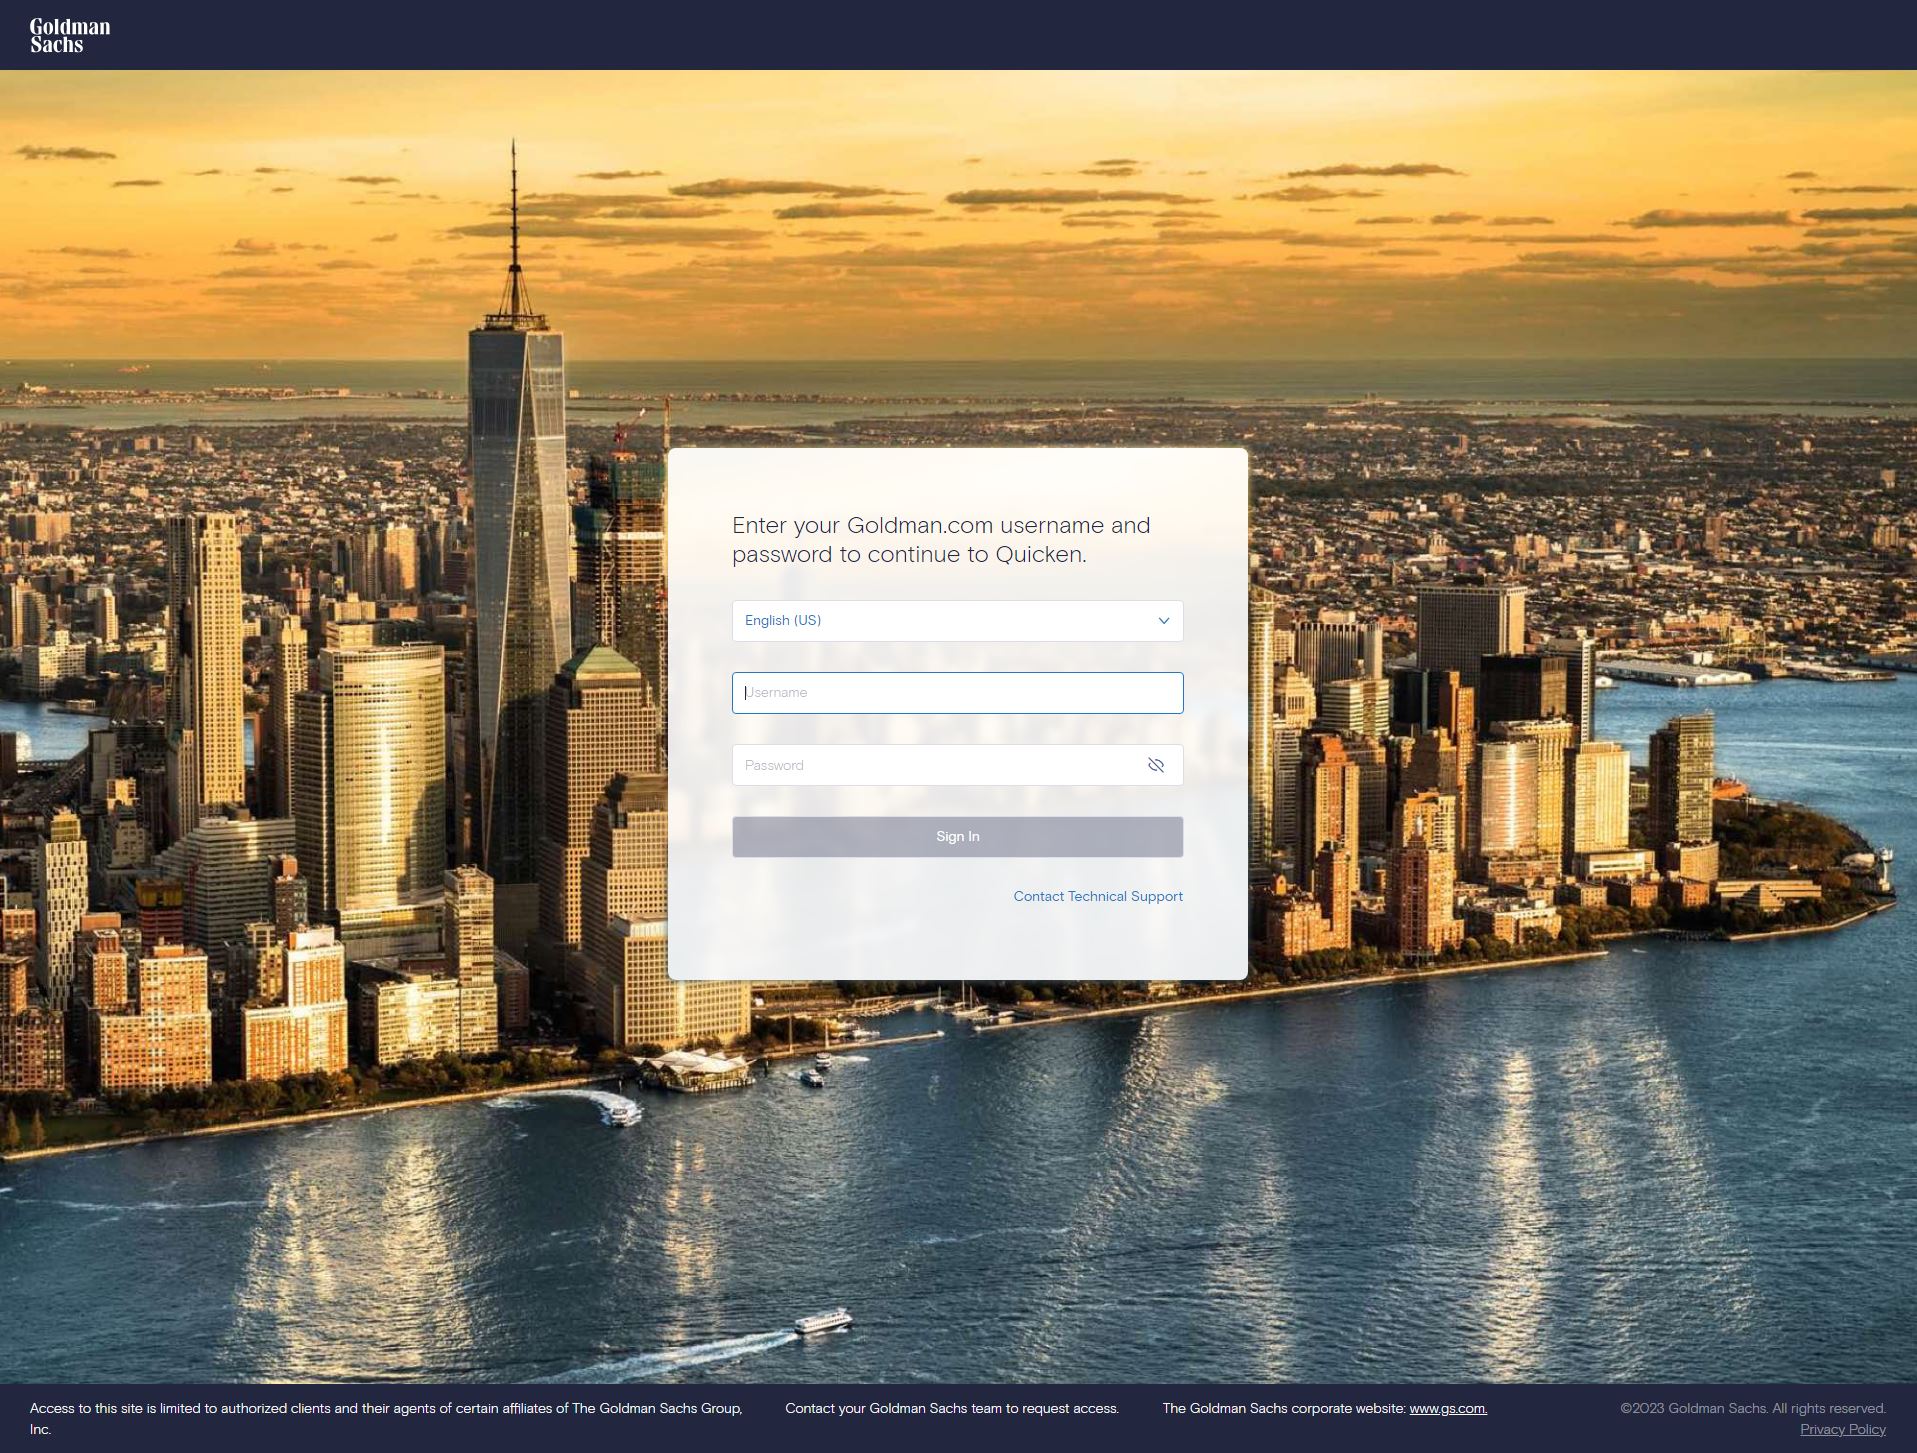
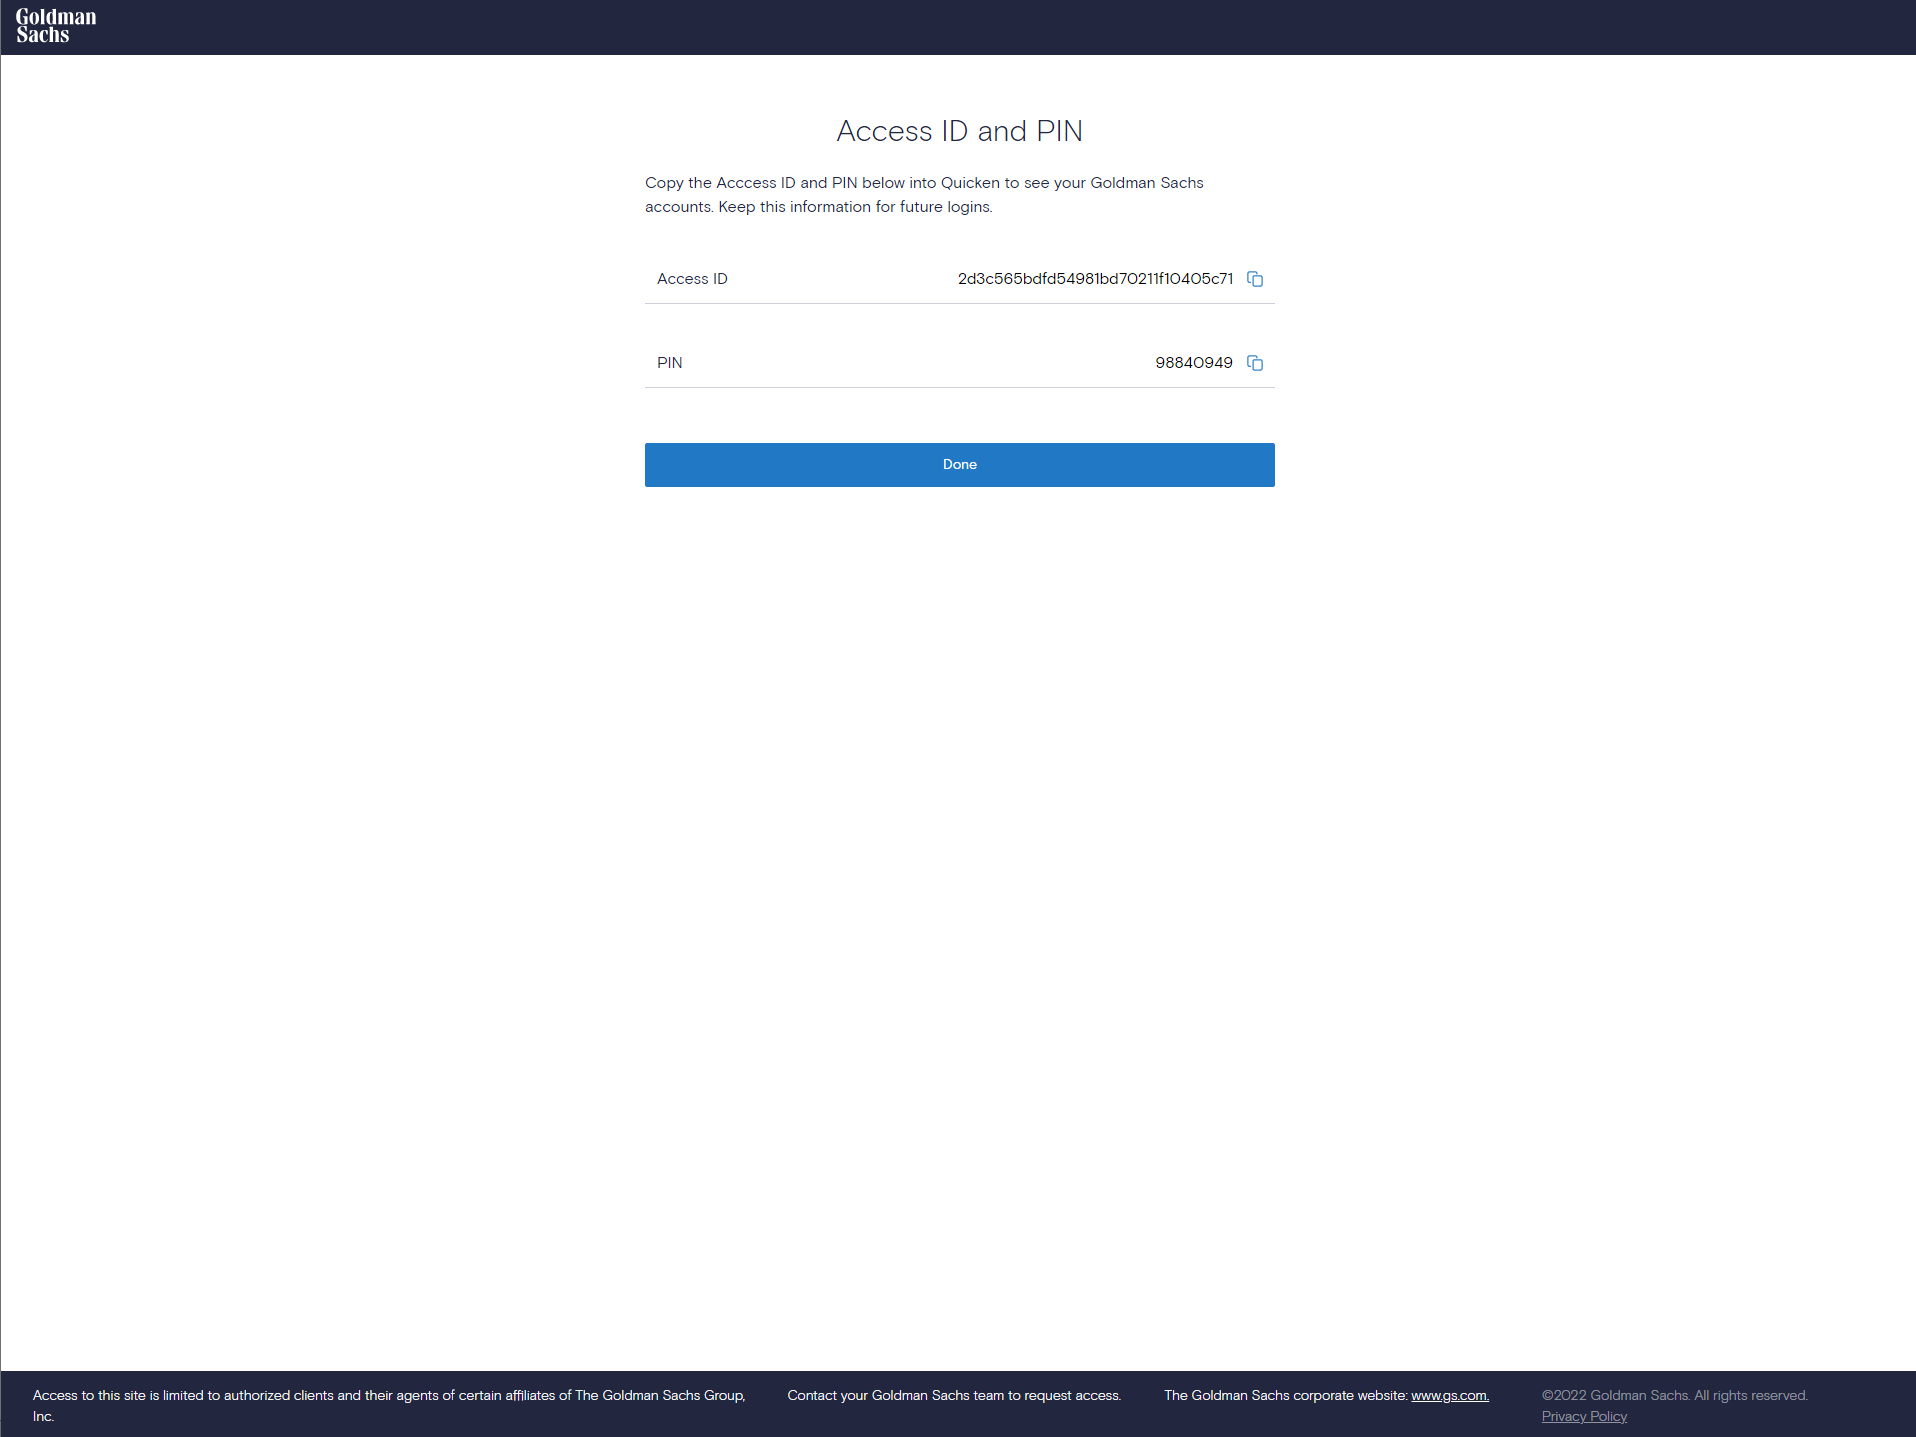
- This will bring you to the GS/ Quicken authentication page which prompts you to enter your Goldman.com credentials.
- Copy access code and pin by clicking on the double box icon next to the long Access ID and PIN.
- Return to the Add Account page in Quicken and paste your Access ID and PIN to proceed
Important: If your credentials do not work, contact GS Technical Support (+1-877-465-3626). It is recommended you save these credentials on Quicken Vault/ Keychain to avoid having to re-enter them as prompted. You might be prompted to re-enter your PIN for connectivity establishment once every 90 days and/ or if you sign out and sign in to Quicken. - Associate your accounts by clicking on “Link to an existing account” and selecting the matching accounts in the drop-down menu.
Important: Do NOT select “Create a new account” unless you intend to add a new account to Quicken. If you are see accounts you do not want to track in this data file, choose Ignore – Don’t add to Quicken or click Cancel - After all accounts have been matched, click Next and then Done
On Mac:
- Go to File > Save a backup.
- Download the latest Quicken Update. Go to Help > Check for Updates.
- Complete a final transaction download. Accept all new transactions into the appropriate registers.
- Click your account in the Accounts list on the left-hand side
- Choose Accounts > Settings > Downloads
- Click on Disconnect Account
- Confirm the action and select Disconnect on the confirmation pop-up.
- Repeat steps for any additional accounts that apply.
- Now reconnect the online banking connection for your accounts. Do not enter your Goldman.com username and password to connect to Quicken.
- Choose Tools > Account List
- Click Edit on the account you want to activate
- In Account Details, click Online Services and then choose Set Up Now
- Type your institution’s name in the search field (Goldman Sachs Private Wealth) and click Next
- This will bring you to the GS/ Quicken authentication page which prompts you to enter your Goldman.com credentials.
- Copy access code and pin by clicking on the double box icon next to the long Access ID and PIN.
- Return to the Add Account page in Quicken and paste your Access ID and PIN to proceed
Important: If your credentials do not work, contact GS Technical Support (+1-877-465-3626). It is recommended you save these credentials on Quicken Vault/ Keychain to avoid having to re-enter them as prompted. You might be prompted to re-enter your PIN for connectivity establishment once every 90 days and/ or if you sign out and sign in to Quicken. - Associate your accounts by clicking on “Link to an existing account” and selecting the matching accounts in the drop-down menu.
Important: Do NOT select “Create a new account” unless you intend to add a new account to Quicken. If you are see accounts you do not want to track in this data file, choose Ignore – Don’t add to Quicken or click Cancel - After all accounts have been matched, click Next and then Done
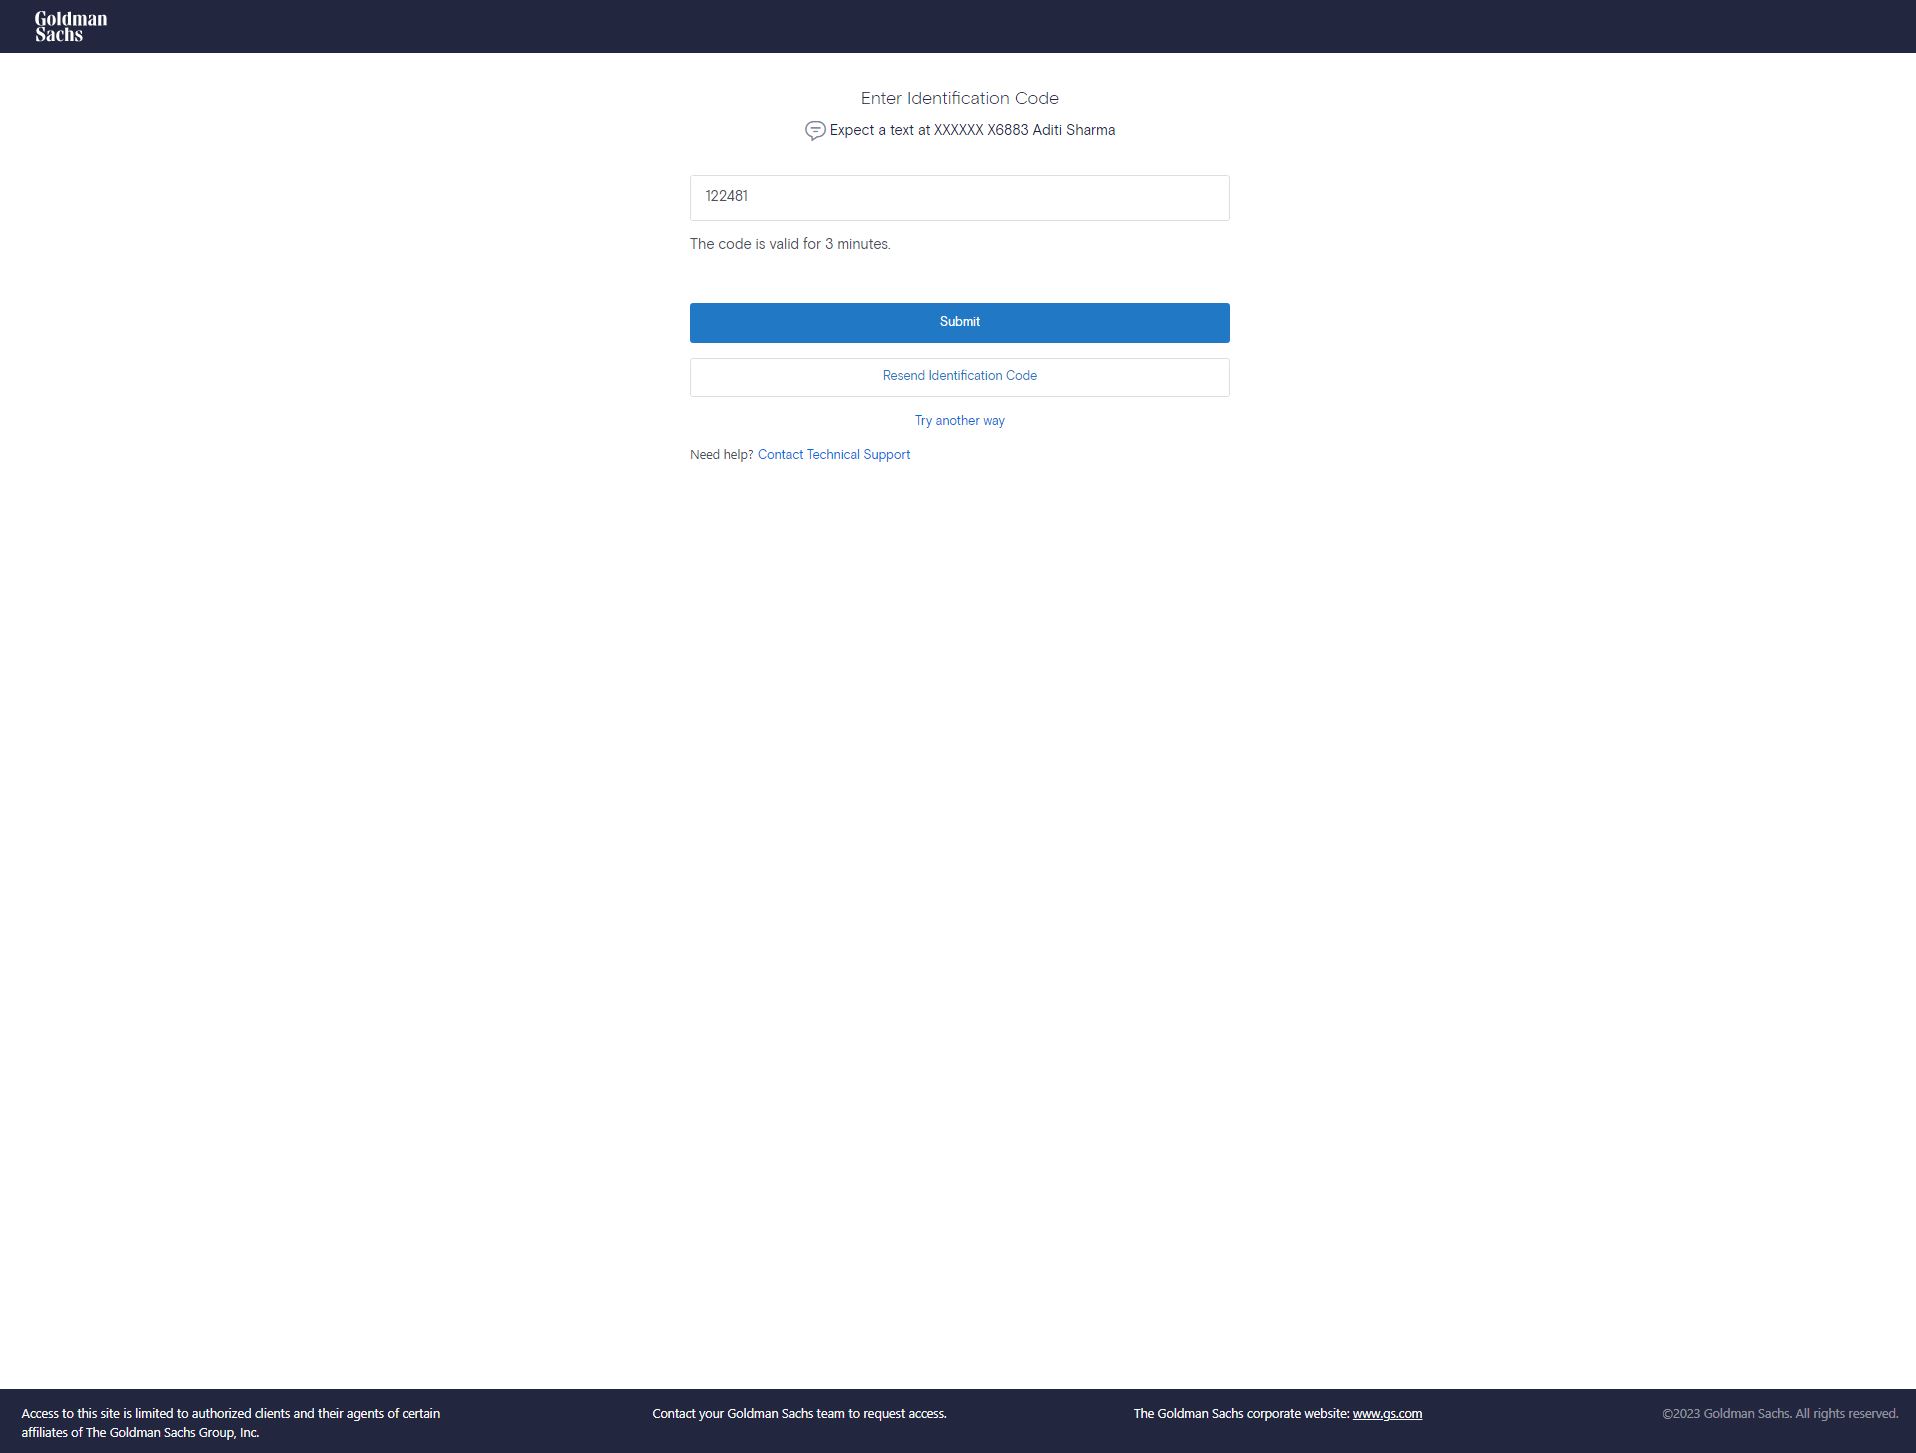
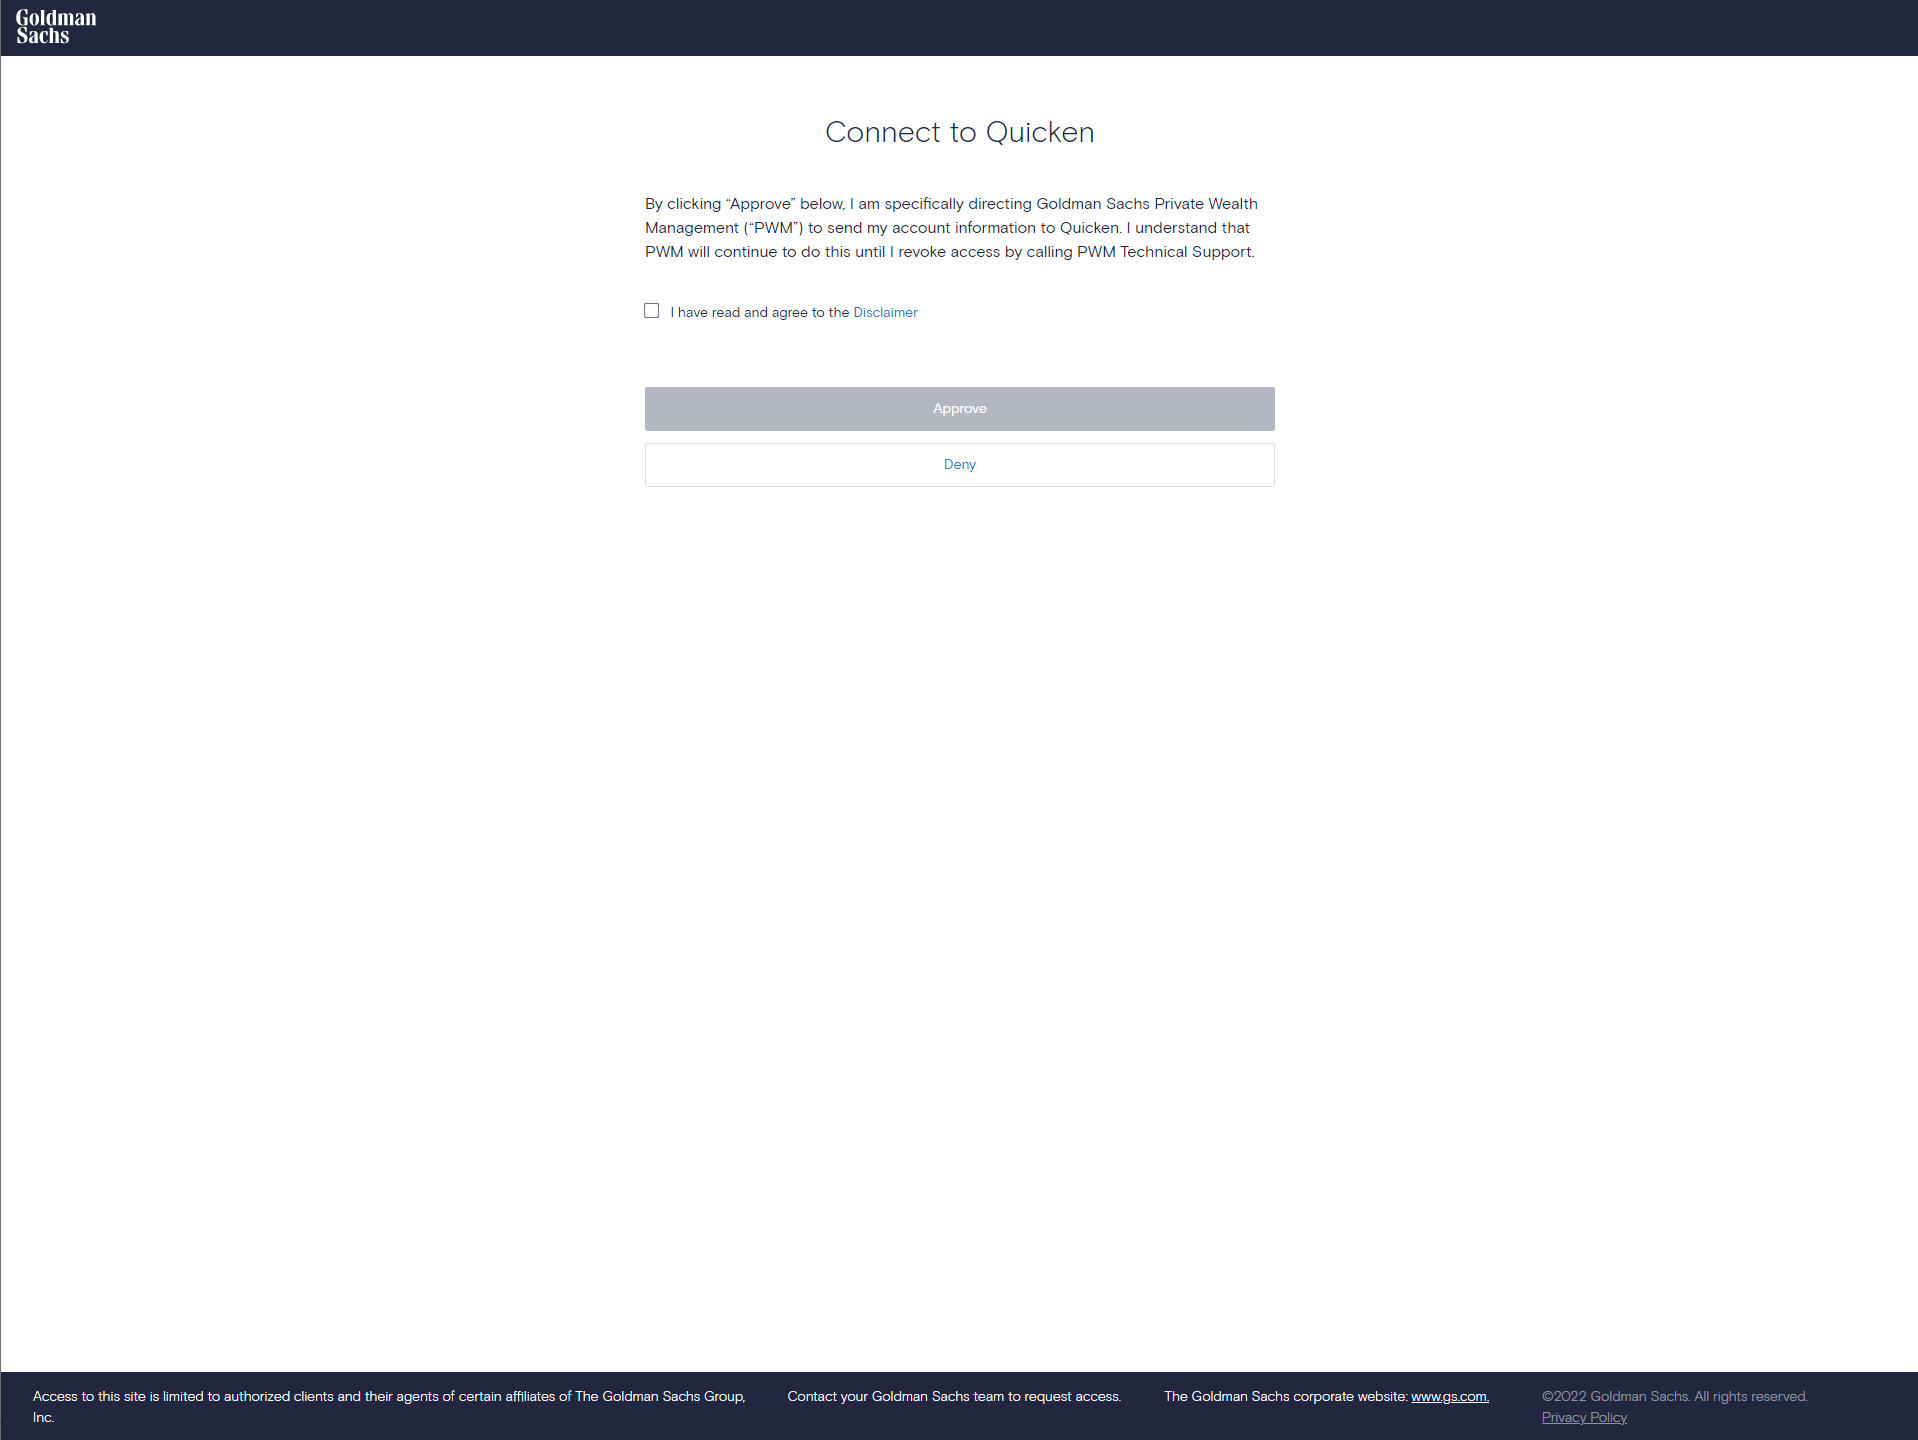
GS secure login flow will look as follows –